Creating a 2025 Calendar in Excel
Related Articles: Creating a 2025 Calendar in Excel
- El Niño 2024-2025: A Comprehensive Analysis
- How Many Days Until 2027: A Countdown To A New Era
- Discover The Enchanting Land Of The Rising Sun: Princess Cruises To Japan 2025
- Spider-Man 4: The Return Of Tobey Maguire In 2025
- New Kicks 2025: The Next Generation Of Footwear Innovation
Introduction
With great pleasure, we will explore the intriguing topic related to Creating a 2025 Calendar in Excel. Let’s weave interesting information and offer fresh perspectives to the readers.
Table of Content
- 1 Related Articles: Creating a 2025 Calendar in Excel
- 2 Introduction
- 3 Video about Creating a 2025 Calendar in Excel
- 4 Creating a 2025 Calendar in Excel
- 4.1 Step 1: Open Excel
- 4.2 Step 2: Create a New Worksheet
- 4.3 Step 3: Enter the Year
- 4.4 Step 4: Format the Year
- 4.5 Step 5: Create the Month Headers
- 4.6 Step 6: Format the Month Headers
- 4.7 Step 7: Create the Day Headers
- 4.8 Step 8: Format the Day Headers
- 4.9 Step 9: Create the Calendar Grid
- 4.10 Step 10: Format the Calendar Grid
- 4.11 Step 11: Enter the Dates
- 4.12 Step 12: Format the Dates
- 4.13 Step 13: Add Events
- 4.14 Step 14: Format the Events
- 4.15 Step 15: Save Your Calendar
- 4.16 Conclusion
- 5 Closure
Video about Creating a 2025 Calendar in Excel
Creating a 2025 Calendar in Excel
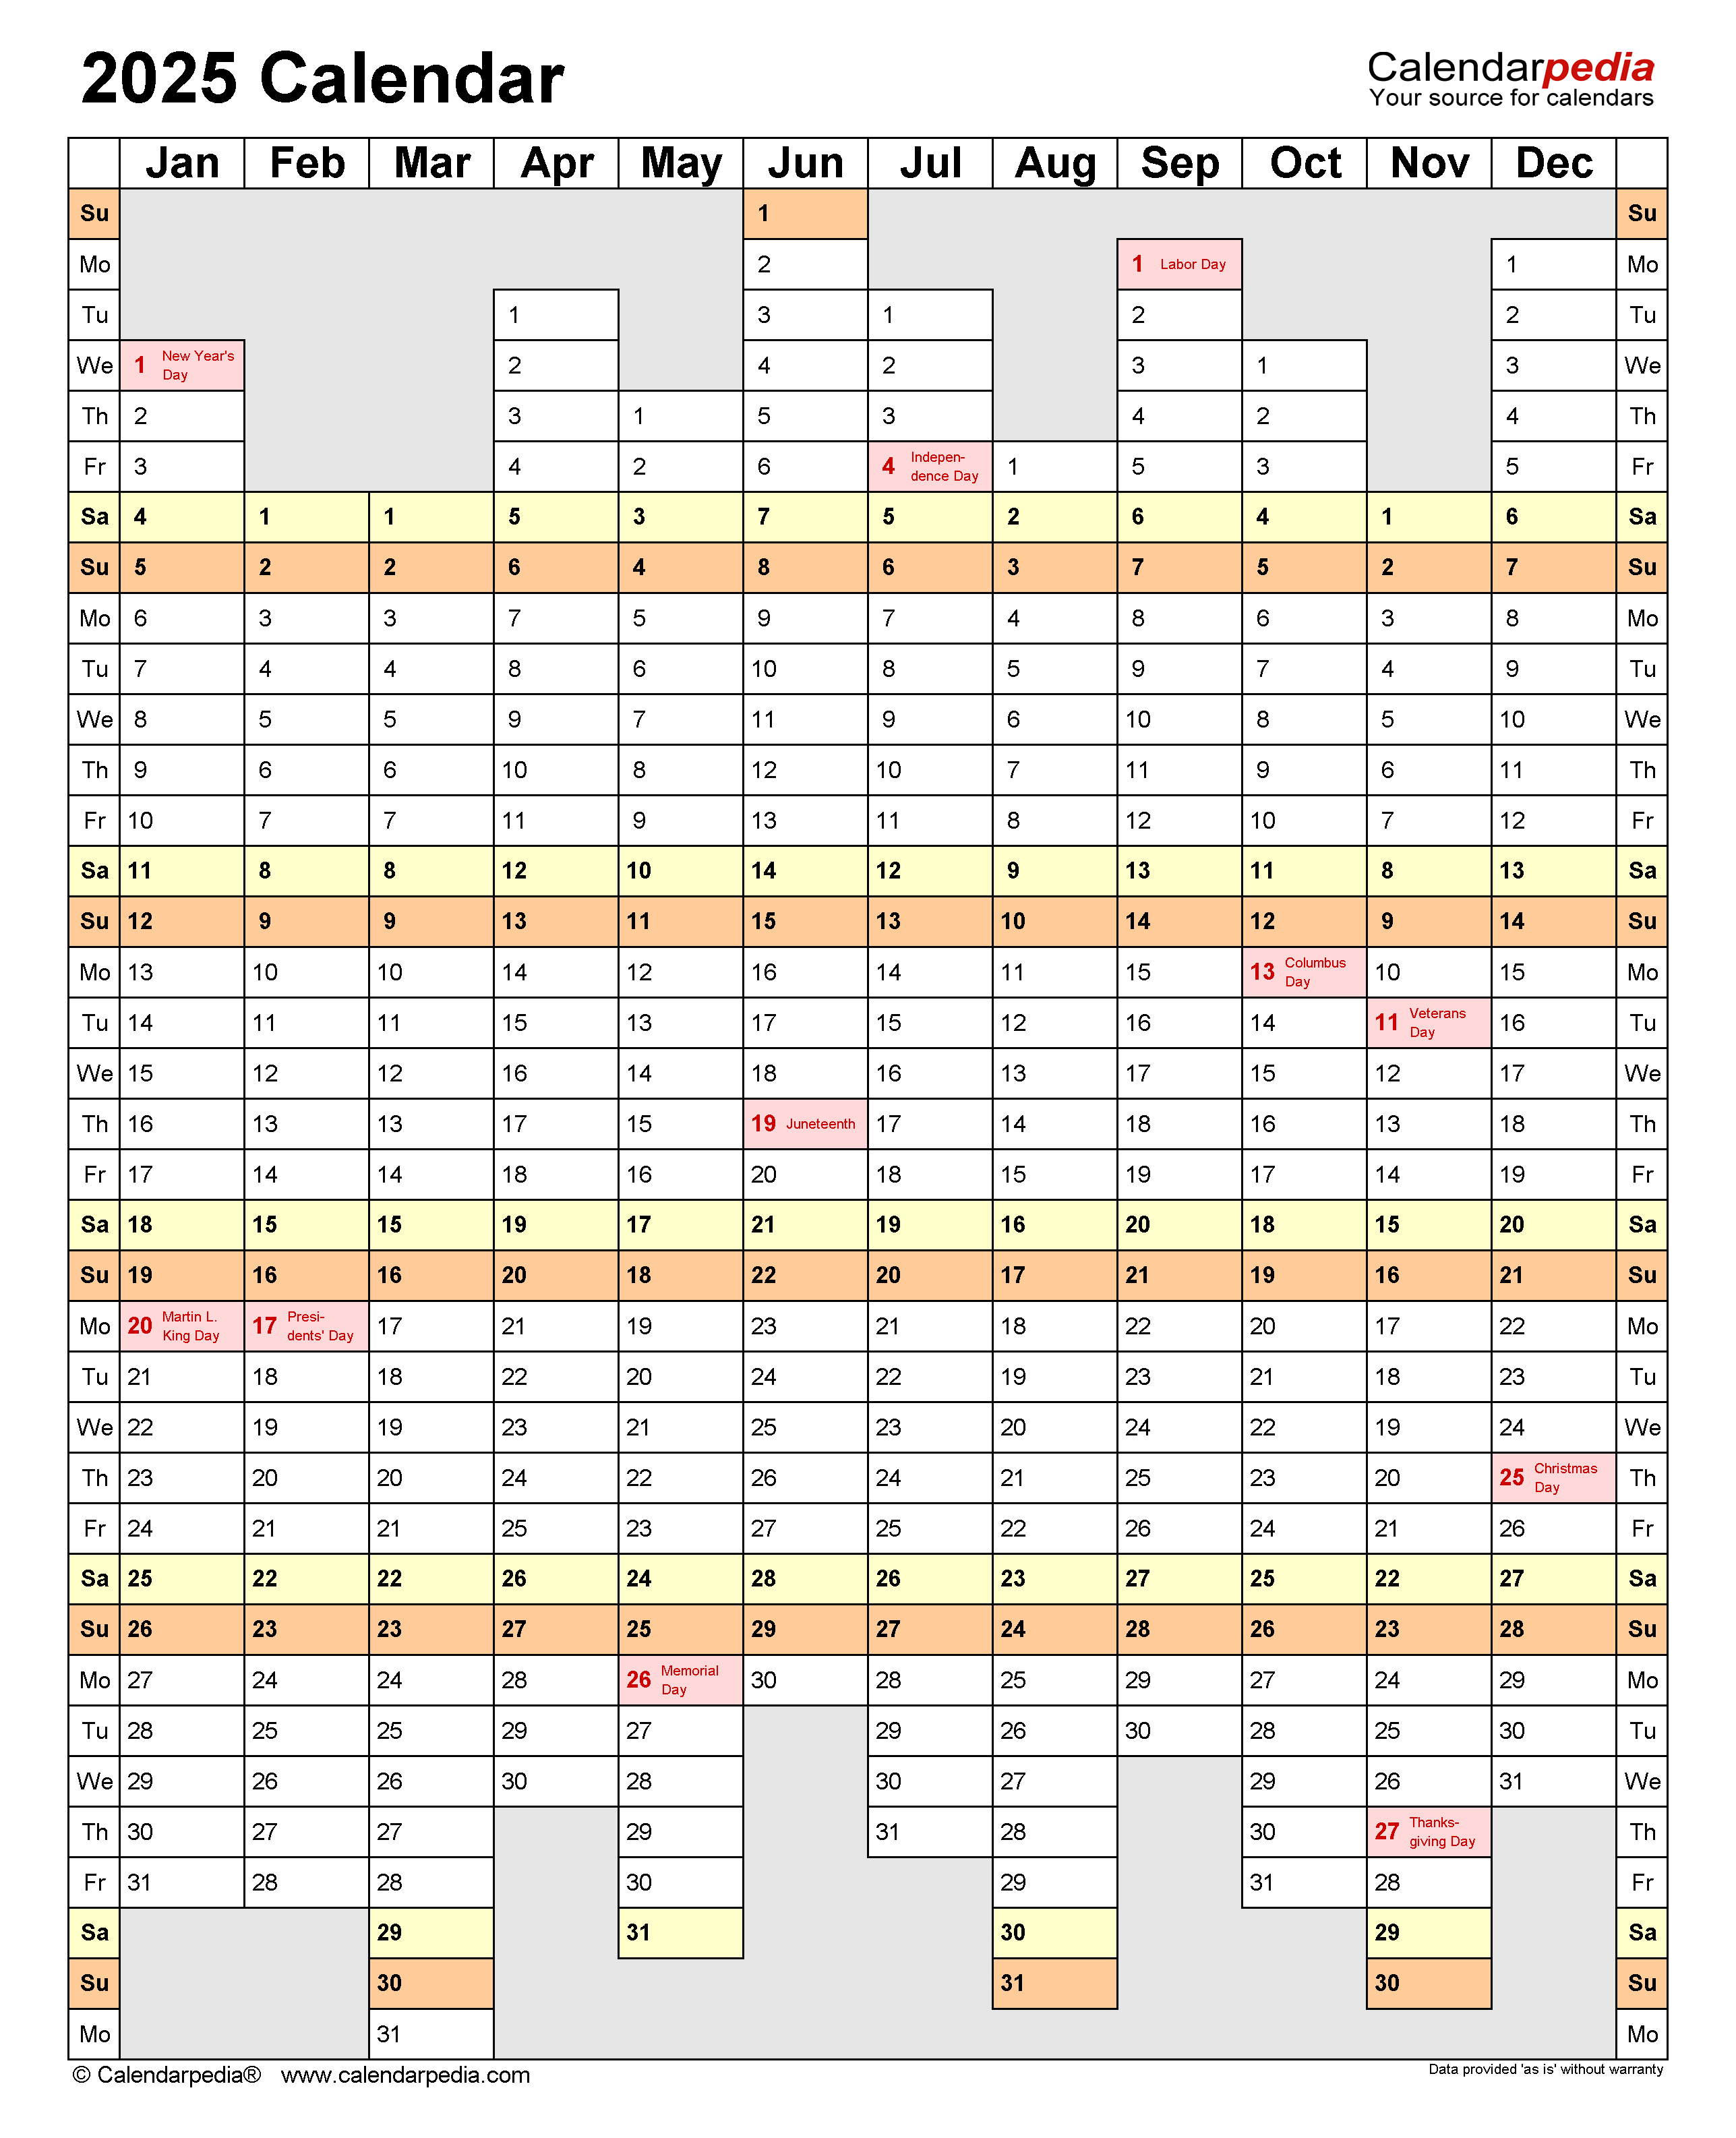
Microsoft Excel is a powerful spreadsheet application that can be used for a variety of tasks, including creating calendars. In this article, we will show you how to create a 2025 calendar in Excel.
Step 1: Open Excel
The first step is to open Microsoft Excel. Once Excel is open, you will see a blank spreadsheet.
Step 2: Create a New Worksheet
If you want to create your calendar on a new worksheet, click on the "+" icon at the bottom of the Excel window. This will create a new worksheet.
Step 3: Enter the Year
The next step is to enter the year for your calendar. To do this, click on cell A1 and type in the year 2025.
Step 4: Format the Year
Once you have entered the year, you can format it to make it look more like a calendar. To do this, select cell A1 and click on the "Format" tab in the Excel ribbon. In the "Number" group, select the "Date" format.
Step 5: Create the Month Headers
The next step is to create the month headers for your calendar. To do this, select cells A2:L2 and type in the names of the months.
Step 6: Format the Month Headers
Once you have entered the month headers, you can format them to make them look more like a calendar. To do this, select cells A2:L2 and click on the "Format" tab in the Excel ribbon. In the "Font" group, select the font that you want to use for the month headers. You can also change the font size and color.
Step 7: Create the Day Headers
The next step is to create the day headers for your calendar. To do this, select cells A3:G3 and type in the names of the days of the week.
Step 8: Format the Day Headers
Once you have entered the day headers, you can format them to make them look more like a calendar. To do this, select cells A3:G3 and click on the "Format" tab in the Excel ribbon. In the "Font" group, select the font that you want to use for the day headers. You can also change the font size and color.
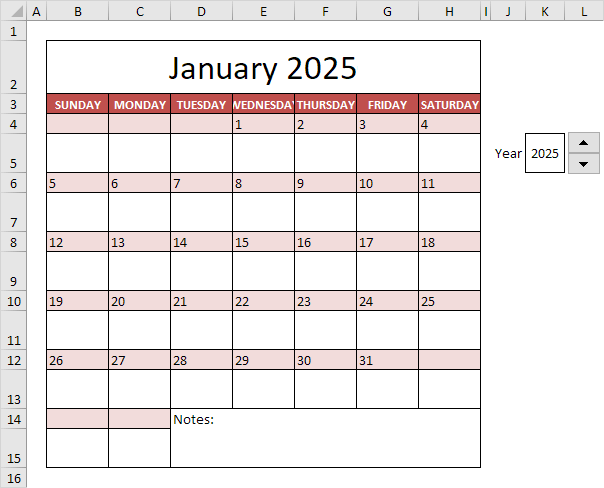
Step 9: Create the Calendar Grid
The next step is to create the calendar grid. To do this, select cells A4:G31. This will create a grid of 30 cells.
Step 10: Format the Calendar Grid
Once you have created the calendar grid, you can format it to make it look more like a calendar. To do this, select cells A4:G31 and click on the "Format" tab in the Excel ribbon. In the "Border" group, select the border style that you want to use for the calendar grid. You can also change the border color.
Step 11: Enter the Dates
The next step is to enter the dates for your calendar. To do this, select cell A4 and type in the date for the first day of the month. Then, press the Tab key to move to the next cell and type in the date for the second day of the month. Continue this process until you have entered all of the dates for the month.
Step 12: Format the Dates
Once you have entered the dates, you can format them to make them look more like a calendar. To do this, select cells A4:G31 and click on the "Format" tab in the Excel ribbon. In the "Number" group, select the "Date" format.
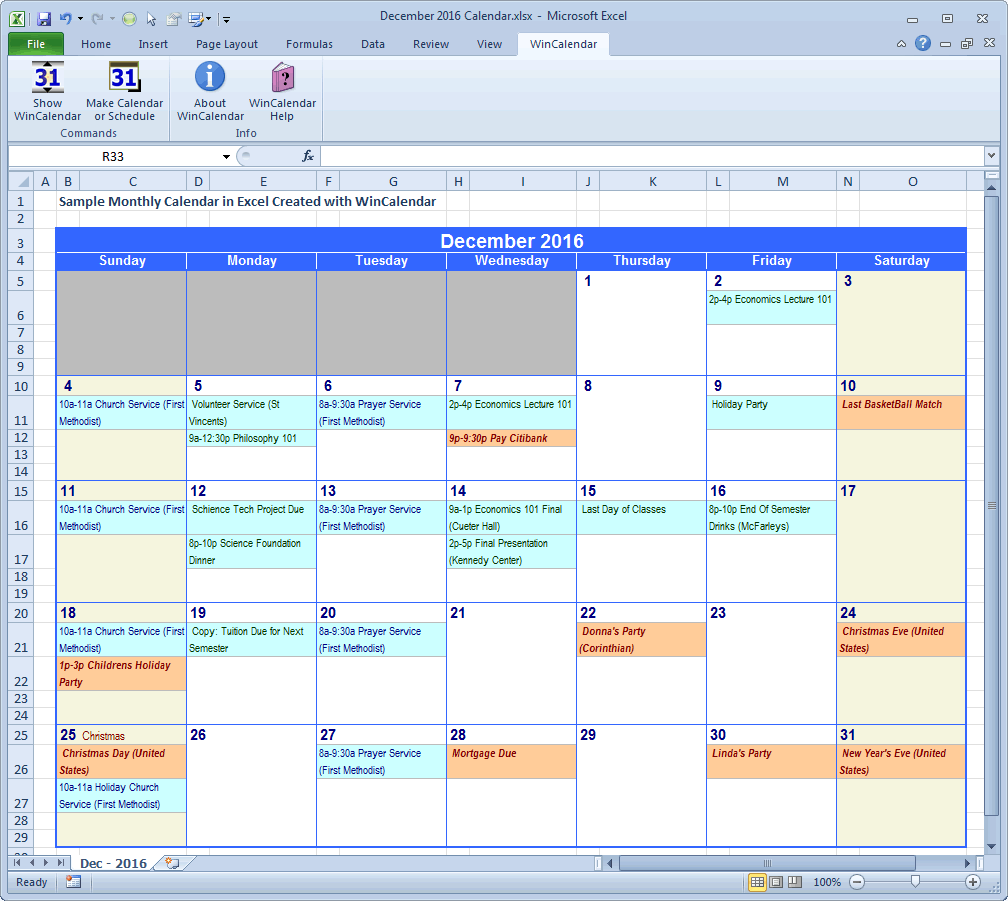
Step 13: Add Events
If you want to add events to your calendar, you can do so by typing the event in the cell that corresponds to the date of the event. For example, if you want to add an event on January 1, 2025, you would type the event in cell A4.
Step 14: Format the Events
Once you have added events to your calendar, you can format them to make them stand out. To do this, select the cells that contain the events and click on the "Format" tab in the Excel ribbon. In the "Font" group, select the font that you want to use for the events. You can also change the font size and color.
Step 15: Save Your Calendar
Once you have finished creating your calendar, you can save it by clicking on the "File" tab in the Excel ribbon and then clicking on "Save As." In the "Save As" dialog box, select the location where you want to save your calendar and then click on the "Save" button.
Conclusion
Creating a calendar in Excel is a quick and easy way to keep track of your appointments and events. By following the steps in this article, you can create a 2025 calendar that is both functional and stylish.

Closure
Thus, we hope this article has provided valuable insights into Creating a 2025 Calendar in Excel. We thank you for taking the time to read this article. See you in our next article!